To search for an existing Registry component:
1. Log onto Umler as described in Logging In. The Umler Welcome page is displayed (Exhibit 8).
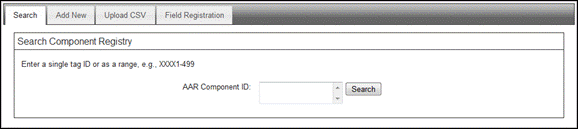
2. Select Component Registry>Registration. The Search Component Registry tab page is displayed (Exhibit 12).
Exhibit 12. Search Component Registry
3. Type in a component ID. Ranges are supported up to 500 IDs. Format is XXXX (four alpha characters) plus up to ten digits. In this example (Exhibit 13) components from RAIL from 1625-2000 was entered.
Exhibit 13. Component Registry Search Results
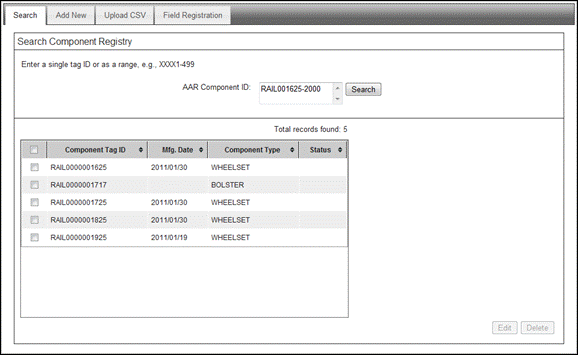
Select components individually using the check box beside the component. Use the checkbox at the left of the gray header to select/unselect all components in the list.
4. Choose from the following tasks:
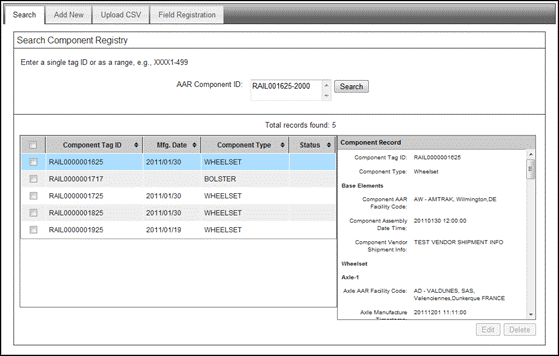
Highlighting a component row displays a box with the beginning of the component registration details (Exhibit 14). To view details of a different component, select its row. To view complete details, the user must Edit the record, discussed in the next section.
Exhibit 14. Component Registry Search Results with Component Details
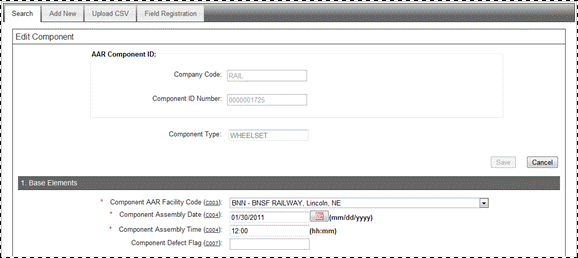
Components can be edited one at a time. To edit a component:
1. After a successful search for a component, check the box to its left and select Edit. The Edit Component panel is displayed (Exhibit 15).
Note: Only a portion of each section is shown in these exhibits. For complete information about the entire Edit Component interface, see Add. Online Element Help provides a complete description of each element.
Mandatory elements are shown with an asterisk (*).
Exhibit 15. Edit Component (top and bottom for Wheelsets)
.
.
.
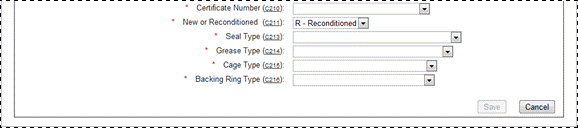
Note: The Component ID fields cannot be changed.
2. When changes have been made to the component, select Save (either at top or bottom of interface). A confirmation message is displayed at the top of the interface. Select Cancel to exit.
When a component has been entered in error, it can be deleted. To delete a component (or a group of components):
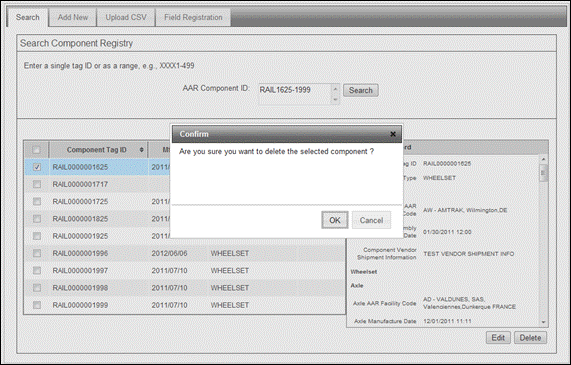
1. After a successful search for components, check the box to the left of each component to be deleted, and select Delete. The Confirm (delete) panel is displayed (Exhibit 16).
Exhibit 16. Delete Component Confirmation
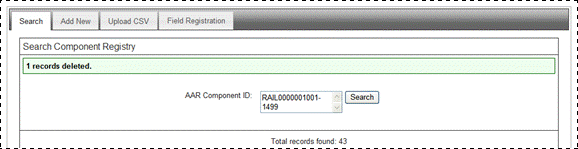
2. If unsure about the deletion, select Cancel. Otherwise, select OK. A success message is displayed below the page title (Exhibit 17).
Exhibit 17. Delete Component Success Message
Note: Assigned components cannot be deleted.
![]()
Legal Notices | Terms of Service | Umler Reference Materials
© 2013 Railinc Corp. All rights reserved.